A Simple Piano App Developed By Tonejs
Motivation
When I was pregnant, my husband bought me a piano, because he wanted us and our baby to learn piano together. Hmm… a good point:)
But I found it difficult to find a free app that teaches me how to play. Most of the sheet music that I love are in-app purchases. So I decided to make a simple app to help myself read sheet and play piano.
A Glance
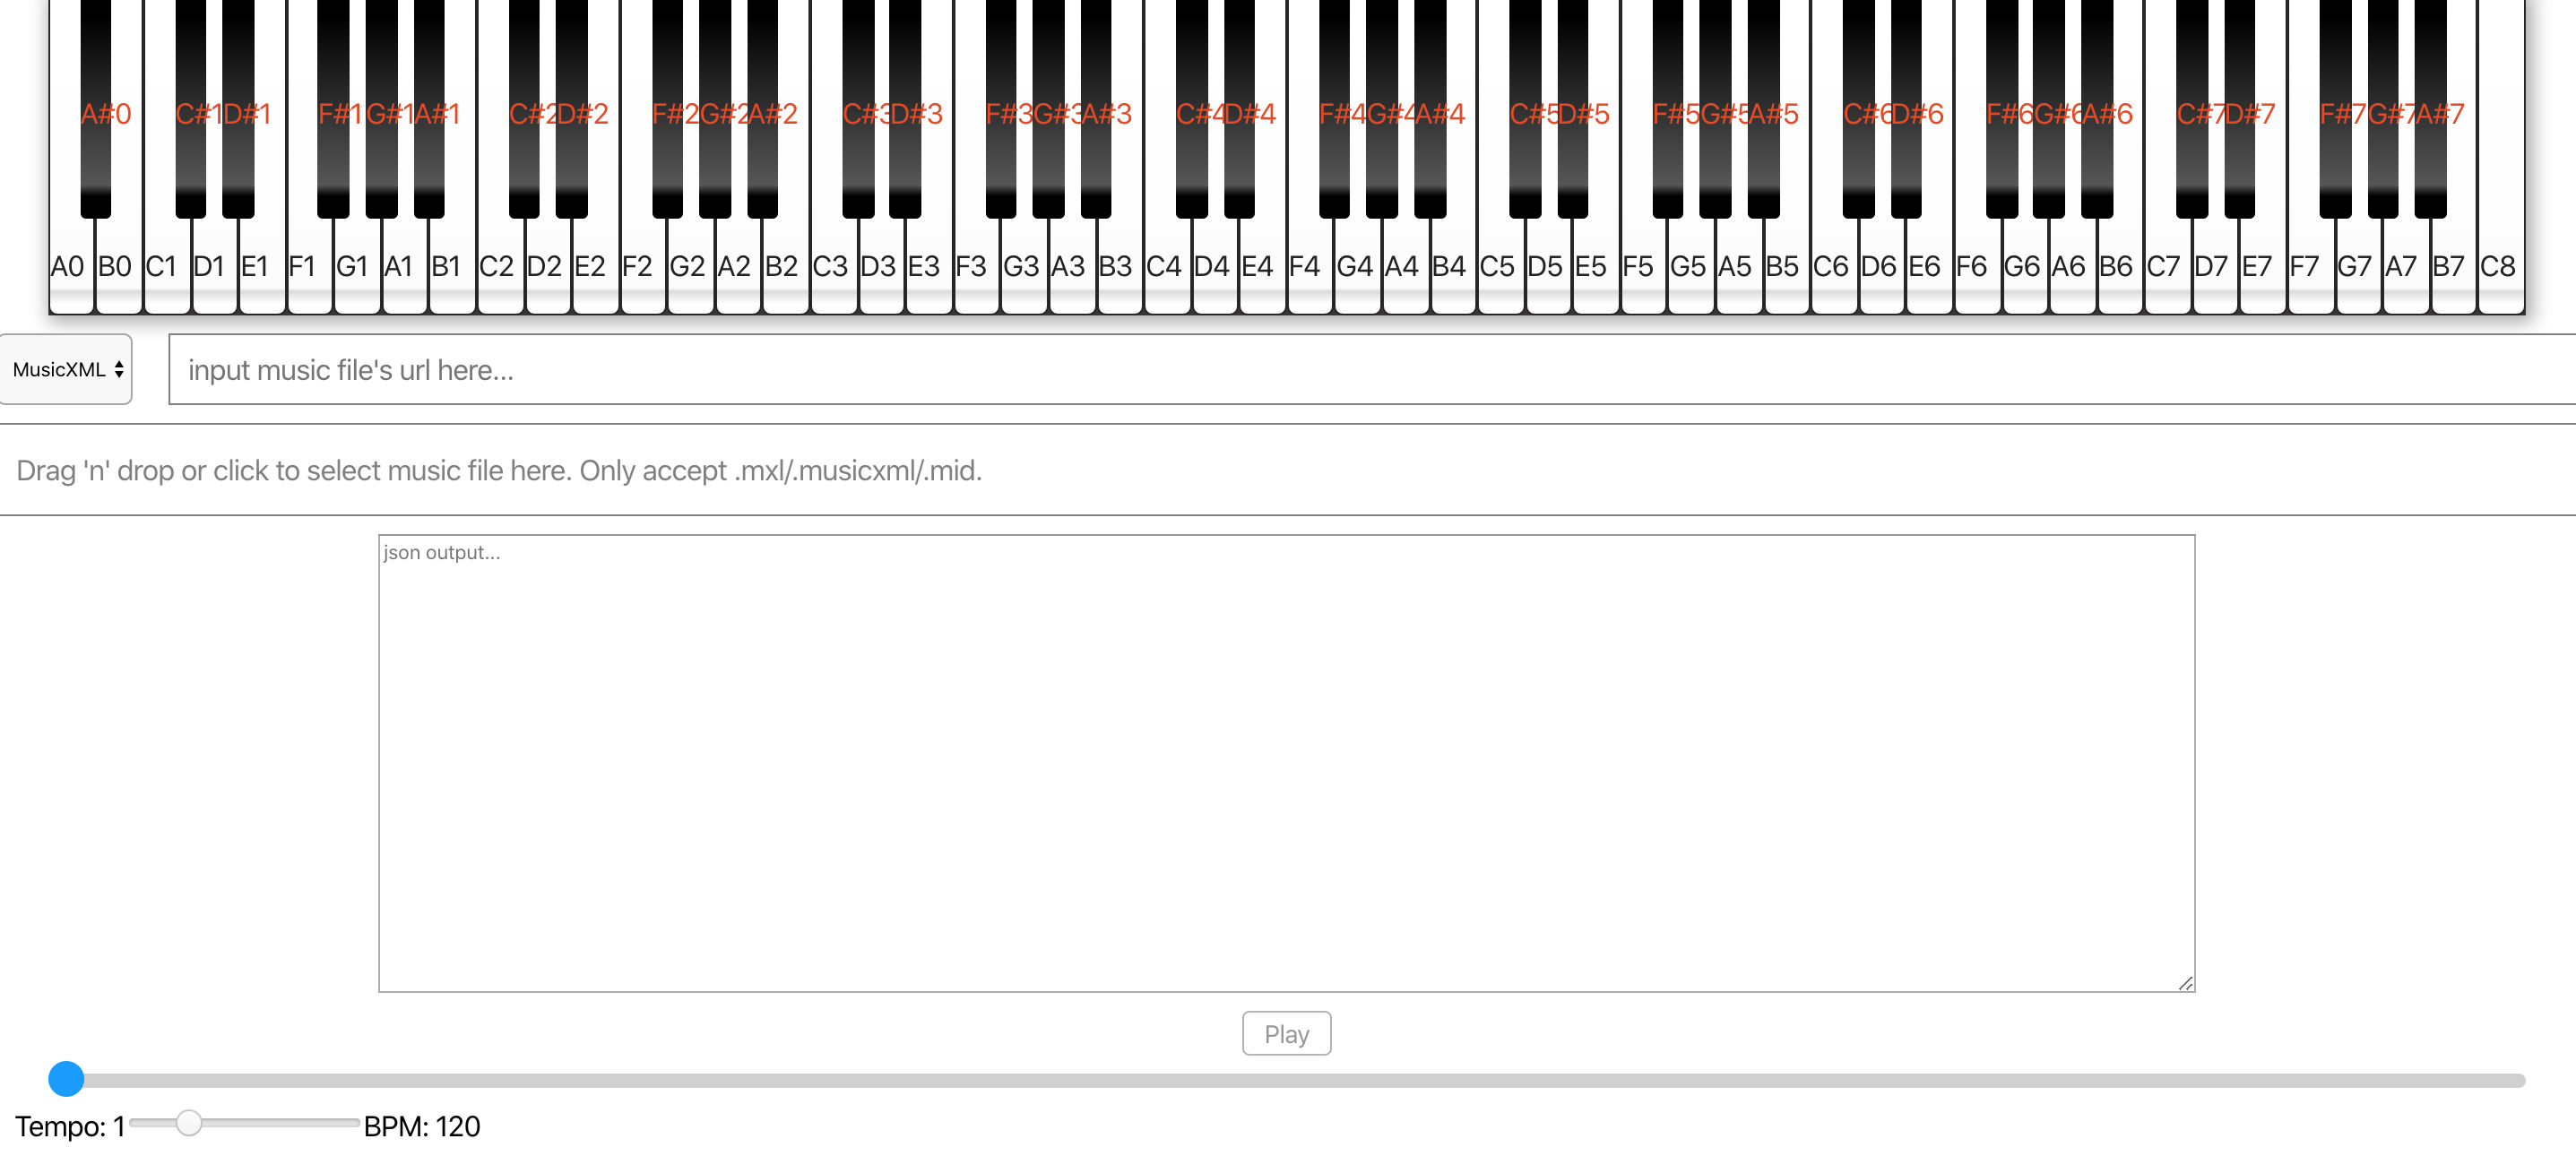
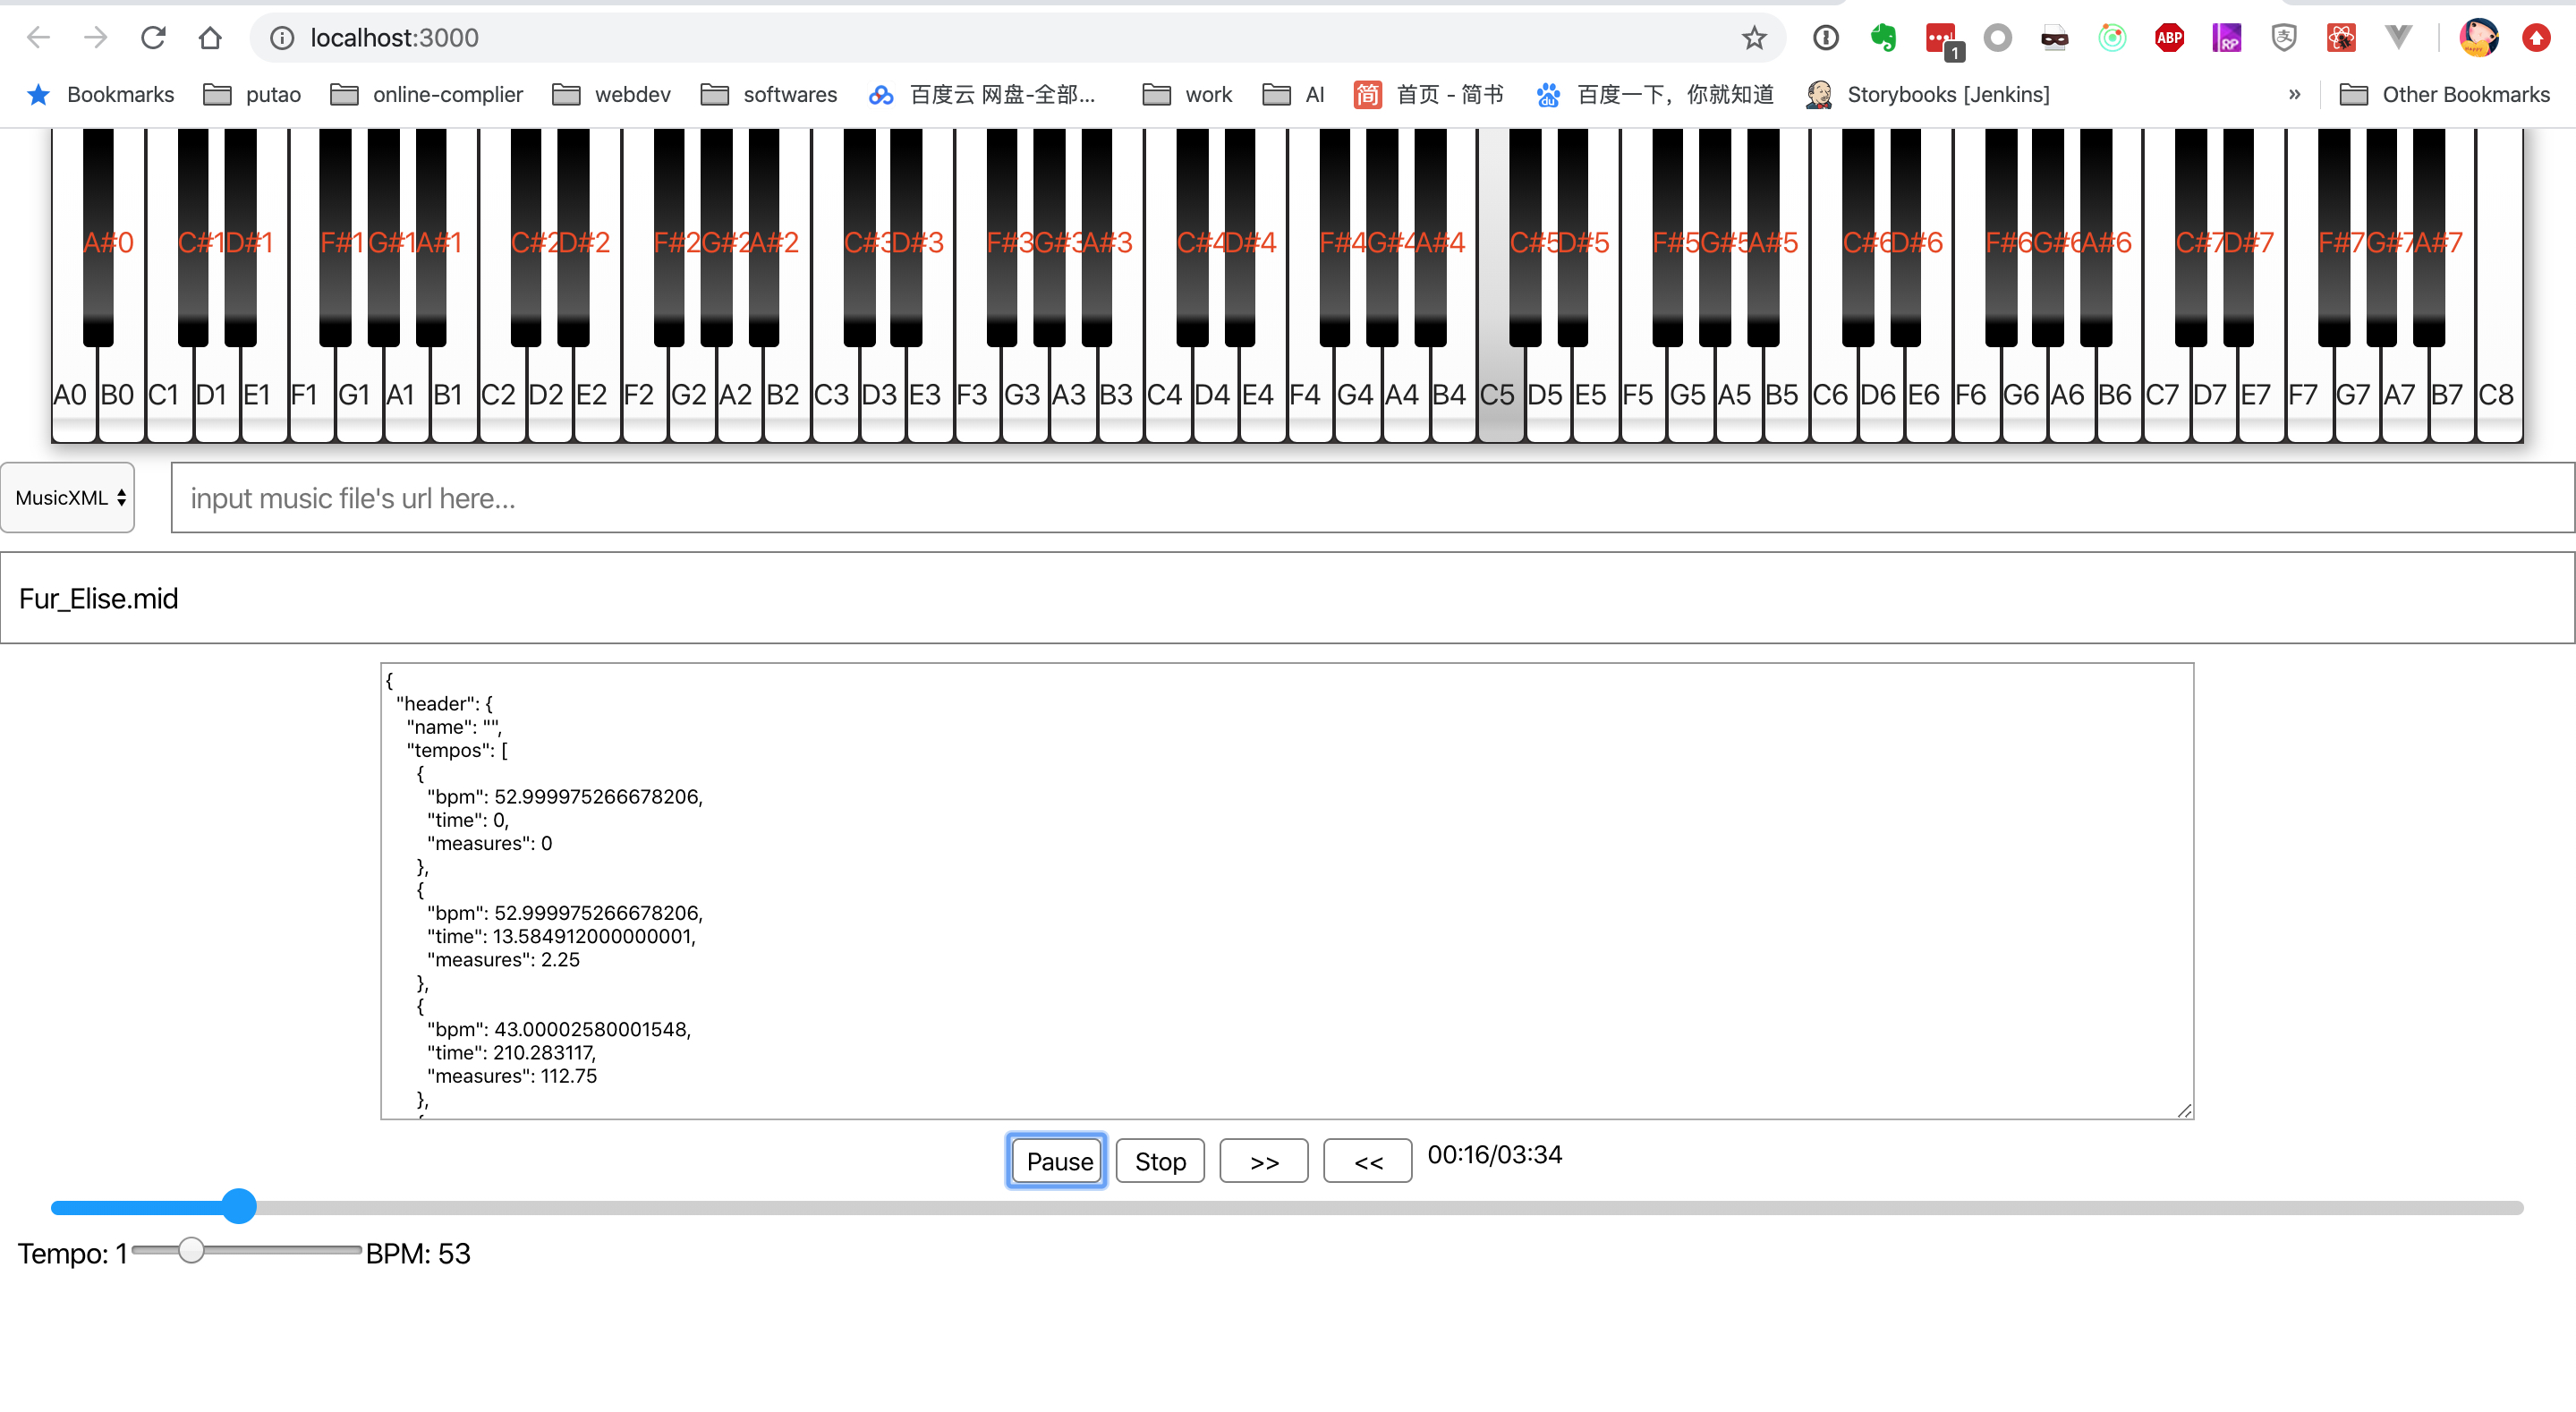
This is how it looks.
- The white and black keys on the piano can be clicked to play.
- It supports two types of music files: MIDI and MusicXML. Also it outputs the parsed json content of the music files.
- It provides a simple play control, including play, pause, resume, step forward and backward, as well as the playback speed.
Deep Into The Main Features
1. The Keyboard Interface
This little virtual keyboard is simply created by css styles, calculating the position and color of each key. Also bind the click event to each key with a unique identifier.
In addition, to fullfil autoplay, I use redux state. Connect the key states to the activeKeys in the redux store, which can be updated somewhere else, e.g. the midi player.
2. Read Music Sheet
We support two music file types: MIDI and MusicXML. Reading MIDI files can be simply done using tonejs/midi, which provides api to load MIDI files into javascript object, so I can retrieve the information needed to play using Tonejs.
For MusicXML, I use musicxml-interfaces, which helps me to parse alien sheet music into javascript object. The most difficult and time consuming part is then to extract and organise the information needed to play using Tonejs. I checked musicxml docs a lot for understanding what each element in the sheet music means. Maybe now there are many good works out there which can accomplish this task. If you are interested in the detailed implementation, you can reference the musicxml docs and dive deep into my code. I will ignore the illustration here, as it is really a long story.
3. Display Music Sheet
I use OpenSheetMusicDisplay to render MusicXML sheet music, which is really a wonderful tool. The usage is quite simple. Call the constructor first, and then load the mxl file, which is a promise. Call render function when the promise resolves.
componentDidMount() {
  this.osmd = new OpenSheetMusicDisplay("osmd");
}

componentWillReceiveProps(nextProps: MusicSheetProps) {
  if (!nextProps.content) {
    this.osmd.clear();
    return;
  }
  this.osmd.load(nextProps.content).then(
    () => {
      this.osmd.render()
    }, (e) => {
    console.log("music sheet load error\n", e);
  });
}
4. Play Music
This is the part of playing with Tonejs.
Sound Generation
I chose Tone.Sampler to generate the piano sounds. I followed the code from tonejs-instruments and only generate a piano sampler that I prefer. Of course we can generate more samplers like violin, bassoon, clarinet, etc, to create a choir!
Schedule the Play
Tone.Transport is the main timekeeper. It can be started, stopped, paused, and adjusted on the fly. Adjust here means we can modify the bpm, time signatures, etc. Additionally, which I think is the most important is that we can arrange events along the Transport. Thus, we can schedule the timeline of the music sheet in advance, and then call Tone.Transport.start to start playing it. The event is also created using Tone.Event. Below are pieces of code for arranging the timeline.
//adjust the bpm on the fly
midi.header.tempos.forEach((tempo, tempoIndex) => {
  if (tempoIndex === 0) {
    Tone.Transport.bpm.value = tempo.bpm;
  } else {
    const e = new Tone.Event(time => {
      Tone.Transport.bpm.value = tempo.bpm;
      this.setState({ ...this.state, originBpm: tempo.bpm });
    });
    e.start(tempo.time);
    this.noteEvents.push(e);
  }
});
//arrange the music timeline
midi.tracks.forEach((track, trackIndex) => {
const synth = this.pianoSynths[trackIndex];
track.notes.forEach((note, noteIndex) => {
const e = new Tone.Event(time => {
synth.triggerAttackRelease(note.name, note.duration, time, note.velocity);
this.props.dispatch(triggerKey(note.name, note.duration));
});
e.start(note.time);
this.noteEvents.push(e);
});
});If the song is stopped unexpectedly, we should clean the schedule using Tone.Transport.cancel(), which removes scheduled events from the timeline.
Control the Play
Tone.Transport provides apis for simply controlling the play as belows:
switch(eventType) {
  case "Play":
    Tone.Transport.start();
    break;

  case "Pause":
    Tone.Transport.pause();
    break;

  case "Resume":
    Tone.Transport.start();
    break;

  case "Stop":
    Tone.Transport.stop();
    break;

  default:
    break;
}
But how to step forward and backward. Actually this frustrated me for a while, and at last I came out an idea that was not that perfect in my mind. Unfortunately, Tone didn't provide a straightforward solution.
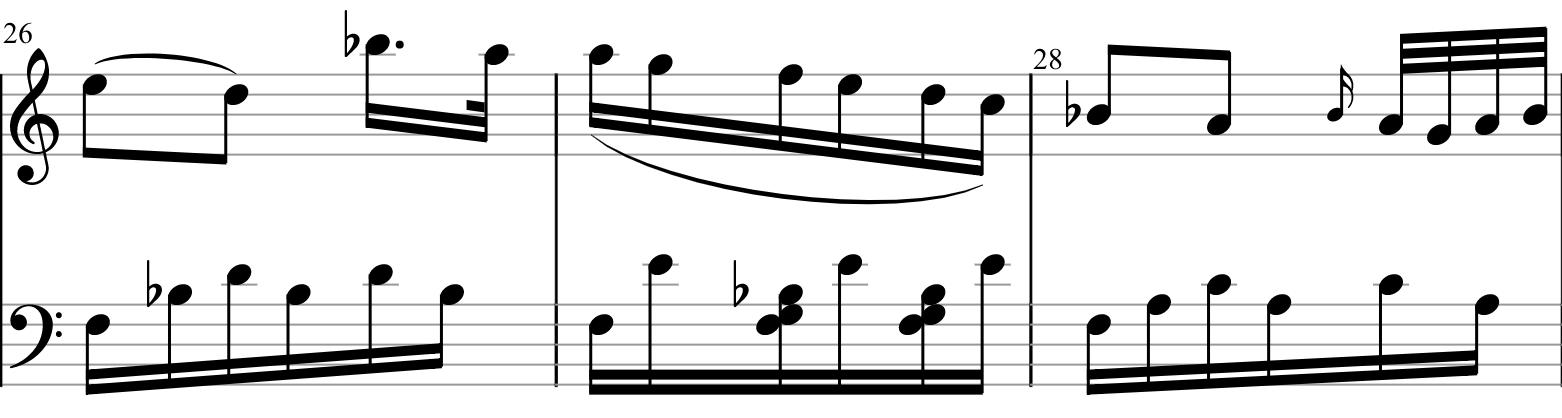
As we see from the above piece of music, commonly the piano sheet has at least two tracks. So I keep a record of the last played note in each track, so that I can get the next or the previous note of each track.
For implementing step forward, after I get the next note of each track, I sort both the start point and the end point of all the next notes on the timeline, as below:

Then set the Tone.Transport.position at the first start time, which is track1_note1_start here:
//start from the nearest next note
Tone.Transport.position = Tone.Time(timeLine[0]).toBarsBeatsSixteenths();
and pause at the end of the first play duration, which is track1_note1_end here.
//pause after the shortest gap
let duration = 0;
for (let i = 1; i < timeLine.length; i++) {
  const gap = timeLine[i] - timeLine[0];
    if ( gap > 0.0001) {
    duration = gap;
    break;
  }
}

Tone.Transport.start();
Tone.Transport.pause(`+${duration}`);
Dealing with the step backwards is similar, except one tip that Tone.Transport.position should be set at the start point of one note.
Not Enough Though
This tiny app is far away from good enough, although I can use it to read some sheet music and autoplay the music, following with it. Also it inspires me to create a tiny music game, which creates stuff for interaction at the beats.